
Imagine controlling all your smart devices from one simple hub—no more juggling apps or switching between gadgets. With a DIY Smart Home Central Controller, you can take full charge of your home’s technology easily and affordably.
This means smoother routines, better security, and a home that truly responds to you. Ready to transform your space and simplify your life? Keep reading to discover how you can build your own smart home controller step-by-step.
Choosing The Right Controller
Picking a smart home central controller is a key step. It helps you manage all your devices in one place.
The right controller makes your home smarter and easier to control every day.
Popular Controller Types
There are many types of smart home controllers. Each type works differently and has unique features.
- Hub-based controllers connect all devices through a central hub.
- App-based controllers let you control devices using a smartphone app.
- Voice assistants use voice commands for control and work with many devices.
- DIY controllers allow customization with open-source software and hardware.
Compatibility With Devices
Check if the controller works with your devices. Not all controllers support every brand or type.
Look for controllers that support common standards like Zigbee, Z-Wave, or Wi-Fi.
- Smart lights
- Thermostats
- Security cameras
- Smart locks
- Voice assistants
Budget Considerations
Controllers come in many price ranges. Choose one that fits your budget and needs.
Remember to include costs for any extra accessories or subscriptions.
- Basic controllers cost less but may have fewer features.
- Mid-range options balance price and functionality.
- High-end controllers offer advanced features but are more expensive.
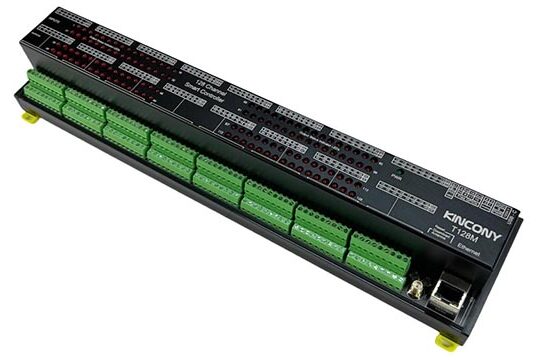
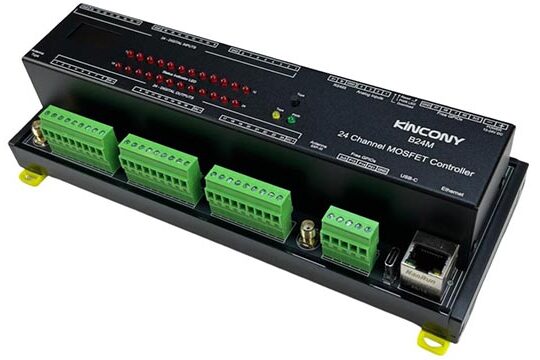
Credit: www.kincony.com
Essential Components
A DIY smart home central controller needs certain parts to work well. These parts help the controller talk to devices and manage your home.
Understanding each component helps you build a system that is reliable and easy to use.
Sensors And Actuators
Sensors collect information from your home, like temperature or motion. Actuators control devices, such as lights or locks, based on commands.
Common sensors include:
- Temperature sensors to check heat levels
- Motion sensors to detect movement
- Light sensors to measure brightness
- Humidity sensors to track moisture
Actuators can be:
- Relays to turn devices on or off
- Motors to open or close windows
- LEDs to show system status
Communication Protocols
Communication protocols let devices send and receive data. They ensure all parts of the system work together smoothly.
Popular protocols for smart homes include:
- Wi-Fi for fast and wide coverage
- Bluetooth for short-range connections
- Zigbee for low power and mesh networks
- Z-Wave for reliable device links
Choose a protocol based on range, power use, and device compatibility.
Power Supply Options
Your smart home controller needs a steady power source. Power options affect how long and where the device runs.
Common power supply choices include:
- AC adapters for constant power from outlets
- Batteries for portable or backup power
- USB power for easy connection to many devices
- Solar panels for energy-saving use
Pick power options that match your setup and power needs.
Setting Up Your Controller
Setting up your DIY smart home central controller is an easy process. It involves putting together hardware, installing software, and linking devices.
This guide will help you get your controller ready to manage your smart home devices smoothly.
Hardware Assembly
Start by gathering all parts of your controller kit. This usually includes a microcontroller board, sensors, and connectors.
Carefully connect each component following the instructions to avoid damage.
- Place the microcontroller on a stable surface
- Attach sensors and modules to the correct ports
- Connect power supply securely
- Check all connections before powering up
Installing Firmware
Firmware is the software that controls your hardware. You need to install it for the controller to work.
Use a computer to upload the firmware to the microcontroller using a USB cable or programmer device.
- Download the correct firmware version for your board
- Connect the controller to your computer
- Use firmware upload software to flash the device
- Wait until the installation completes successfully
Connecting Devices
Once the firmware is installed, link your smart home devices to the controller. This lets you control them centrally.
Devices can connect by Wi-Fi, Bluetooth, or wired connections depending on your system.
- Turn on each device you want to connect
- Use the controller interface to add new devices
- Follow prompts to pair or configure each device
- Test each device to confirm the connection works

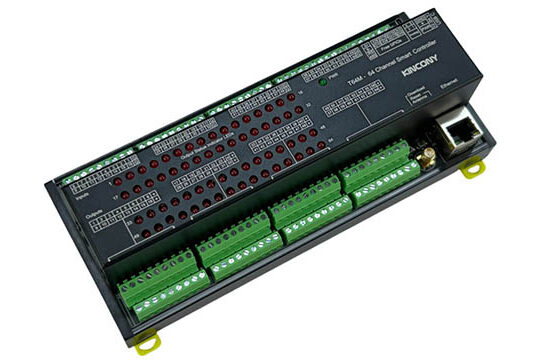
Credit: www.kincony.com
Automation Software Options
Choosing the right software is key to building a smart home controller. Software controls how devices talk and work together.
Many options exist, from free open source to paid commercial software. You can also create your own scripts.
Open Source Platforms
Open source platforms are free to use and customize. They have strong communities that share ideas and help.
These platforms support many devices and allow flexible automation rules. You can change the code to fit your needs.
- Home Assistant: Popular with many integrations
- OpenHAB: Works on many operating systems
- Domoticz: Lightweight and easy to use
- Node-RED: Visual programming for automation
Commercial Solutions
Commercial solutions often offer user-friendly apps and support. They may include cloud features and security updates.
These options usually cost money but save time and effort. They work well for users who want simple setup.
- Samsung SmartThings: Easy setup with many devices
- Apple HomeKit: Secure and integrated with iOS
- Google Home: Works with Google Assistant devices
- Amazon Alexa: Voice control and routines
Custom Scripting
Custom scripting lets you write your own automation code. It gives full control over device behavior.
You need some programming skill for this. Scripts can run on platforms like Python or JavaScript.
- Python scripts for sensor data and actions
- JavaScript for web-based control panels
- Shell scripts to manage devices on a server
- Use APIs to connect different smart devices
Creating Automation Rules
Automation rules help your smart home work on its own. These rules tell devices what to do and when.
You create rules by choosing triggers and actions. This makes your home smarter and easier to use.
Basic Triggers And Actions
Triggers start automation rules. They are events or conditions like time or sensor signals.
Actions are what happens after a trigger. For example, turning lights on or adjusting the thermostat.
- Triggers: motion detected, door opened, temperature change
- Actions: switch on lights, send notification, start music
- Rules link triggers to actions automatically
Complex Scenarios
Complex scenarios use multiple triggers and actions. They create smarter, more useful automations.
You can add conditions like “if this and that” to control when actions happen.
- Combine triggers with AND/OR logic
- Use conditions like time of day or device status
- Chain actions to create sequences
Scheduling And Timers
Scheduling lets you set rules for specific times or days. Timers delay actions for set periods.
This helps automate tasks like turning off lights at night or watering plants every morning.
- Set rules to run at certain times or days
- Use timers to delay or repeat actions
- Combine with triggers for flexible control
Integrating Voice Control
Voice control makes smart homes easier to use. You can control devices with your voice.
Adding voice assistants to your DIY smart home central controller adds convenience. It helps you manage lights, locks, and more.
Popular Voice Assistants
Many voice assistants work well with smart homes. They listen and respond to your commands.
- Amazon Alexa: Works with many devices and skills.
- Google Assistant: Good for Google services and smart devices.
- Apple Siri: Best for Apple HomeKit setups.
- Microsoft Cortana: Integrates with Windows and some smart devices.
Setup Tips
Set up your voice assistant carefully. Follow simple steps for smooth use.
- Connect your voice assistant to the central controller’s network.
- Enable necessary skills or actions for your devices.
- Place microphones where they can hear you clearly.
- Test voice commands to ensure correct responses.
- Update firmware and software regularly.
Privacy Considerations
Voice control devices collect audio data. Protect your privacy with these tips.
- Review and adjust privacy settings often.
- Mute microphones when not in use.
- Use strong passwords for your smart home accounts.
- Keep software updated to fix security issues.
- Limit third-party app permissions.
Ensuring Security And Privacy
Building a DIY smart home central controller means you control your devices. Keeping your home network safe is very important. Protect your privacy from hackers and intruders.
This guide covers key steps to secure your smart home system. You will learn about network security, data encryption, and access controls.
Network Security Measures
Start by securing your home Wi-Fi network. Use a strong password for your router to stop unauthorized access. Change default router settings to avoid easy hacking.
Keep your router firmware updated. Updates fix security issues and bugs. Use a separate network for your smart devices to limit risk if one device is compromised.
- Set a strong, unique Wi-Fi password
- Change default router admin passwords
- Update router firmware regularly
- Create a guest or separate IoT network
- Disable unused features like WPS
Data Encryption
Data encryption protects your information from being read by others. Use encryption to secure communication between your controller and devices. Enable WPA3 or WPA2 encryption on your Wi-Fi network.
Encrypt stored data on your controller to keep it safe. Use secure protocols like HTTPS and SSL for remote access. Encryption makes it hard for attackers to steal your data.
- Use WPA3 or WPA2 for Wi-Fi security
- Encrypt data stored on your controller
- Use HTTPS and SSL for remote connections
- Enable end-to-end encryption if possible
Access Controls
Control who can use your smart home system. Set strong passwords for user accounts. Limit access to trusted users only. Use multi-factor authentication for better security.
Regularly review access permissions and remove unused accounts. Lock your controller’s settings to stop changes by unauthorized users. These steps help keep your system safe from misuse.
- Create strong, unique passwords for accounts
- Use multi-factor authentication (MFA)
- Limit access to trusted people only
- Review and remove unused user accounts
- Lock controller settings against changes
Credit: www.kincony.com
Troubleshooting Common Issues
Setting up a DIY smart home central controller can bring many benefits. Sometimes, issues occur that stop the system from working well.
Knowing how to fix common problems helps keep your smart home running smoothly. This guide covers key issues and simple ways to solve them.
Connectivity Problems
Connectivity issues are common with smart home controllers. Devices may not connect or lose connection often.
Check your Wi-Fi signal strength. Weak signals cause devices to disconnect.
- Move your router closer to the controller.
- Restart your Wi-Fi router and smart controller.
- Ensure no objects block the wireless signal.
- Use a Wi-Fi extender if the area is large.
Device Compatibility
Not all smart devices work with every controller. Some devices may not respond or show errors.
Check if your devices are supported by the controller’s system before connecting them.
- Look for official lists of compatible devices from the controller maker.
- Update device firmware to the latest version.
- Use devices that follow common smart home standards.
Software Bugs
Software bugs can cause your controller to freeze or behave oddly. This may stop automation from working.
Regularly update the controller’s software to fix bugs and improve stability.
- Restart the controller to clear temporary errors.
- Check for software updates and install them.
- Reset the controller to factory settings if problems persist.
Expanding Your Smart Home
Building a smart home starts with a central controller. You can add many devices over time. This makes your home smarter and easier to manage.
Planning how to expand your system helps keep things working smoothly. It saves time and reduces problems later on.
Adding New Devices
Choose devices that work well with your central controller. Make sure they use compatible wireless protocols like Wi-Fi or Zigbee. This helps the devices connect easily.
Start with simple devices like smart lights or plugs. Then add sensors or cameras to improve security and comfort.
- Check device compatibility before buying
- Use devices that support the same protocol
- Test new devices one at a time
- Place devices where they get good signal
Integrating Third-party Services
Many smart home controllers connect to popular services like voice assistants or automation platforms. This lets you control devices by voice or set schedules.
Use official apps or plugins to link your controller with these services. This keeps your setup stable and secure.
- Connect to voice assistants like Alexa or Google
- Use automation tools for custom routines
- Check for official plugins or apps
- Keep software updated for security
Future-proofing Tips
Plan your smart home to work well in the future. Choose controllers that get regular updates. This helps add new features and fix bugs.
Keep your network strong and secure. Use good Wi-Fi routers and change passwords often. This protects your devices and data.
- Pick controllers with active development
- Use standard communication protocols
- Keep your network secure and stable
- Regularly update device software
Frequently Asked Questions
What Is A Diy Smart Home Central Controller?
A DIY smart home central controller is a customizable hub that manages all smart devices in your home. It allows you to control lighting, security, climate, and more from one interface. Building it yourself offers flexibility and cost savings, adapting to your specific needs and preferences.
How Do I Set Up A Diy Smart Home Controller?
Setting up a DIY smart home controller involves selecting compatible hardware and software. You’ll need a central hub, like a Raspberry Pi, and compatible software, such as Home Assistant. Follow installation guides to configure your devices and ensure seamless communication.
Test each device to confirm proper integration and functionality.
What Devices Can I Connect To My Controller?
You can connect a variety of smart devices, including lights, thermostats, cameras, and locks. Ensure each device is compatible with your chosen central controller software. Compatibility extends to protocols like Zigbee, Z-Wave, and Wi-Fi. A well-integrated system enhances automation and provides comprehensive control over your smart home environment.
Is A Diy Central Controller Cost-effective?
Yes, a DIY central controller can be cost-effective. By selecting affordable hardware and open-source software, you reduce expenses. DIY setups also eliminate subscription fees common with commercial systems. Over time, the initial investment pays off as you enjoy personalized automation without recurring costs.
Conclusion
Building your own smart home controller can save money and add comfort. You control devices from one place. It makes daily tasks easier and faster. Simple parts and clear instructions help you start. Enjoy the freedom to customize your system.
Stay safe by following basic security tips. A DIY project like this brings learning and fun. Try it step by step, and see the results yourself. Your home becomes smarter, your life simpler.
24 min read