
Are you tired of high water bills and wasting water without even realizing it? Imagine having a simple device that tracks your water usage in real time, right from your phone.
With a DIY smart home water usage monitor, you can take control of your water consumption, save money, and help the environment—all without waiting for monthly bills to find out how much you’ve used. In this guide, you’ll learn how to build your own monitor step-by-step, making it easy and affordable to start smarter water habits today.
Keep reading to discover how this small project can make a big difference in your home.
Benefits Of Monitoring Water Usage
Tracking your water use at home helps you save money and protect resources. A DIY smart water monitor gives clear data on how much water you use every day.
Knowing your water use patterns helps you find ways to cut waste and fix problems fast. This makes your home more efficient and eco-friendly.
Reducing Water Bills
When you watch your water use, you can lower your monthly bills. The monitor shows which activities use the most water. You can then change habits to use less.
Small changes add up to big savings. Fixing dripping taps or running shorter showers cuts water waste and costs.
- Track daily water use
- Spot high water use activities
- Adjust habits to save water
- Save money on bills
Detecting Leaks Early
Leaks waste water and increase bills without you knowing. A smart water monitor alerts you to unusual water flow quickly.
Finding leaks early stops damage and saves water. You avoid costly repairs and reduce water loss by fixing problems fast.
- Detect unusual water flow
- Receive early leak alerts
- Fix leaks quickly
- Prevent water damage
Promoting Water Conservation
Monitoring water use helps families learn how to save water. Seeing real data makes you more aware of waste and encourages good habits.
Using less water protects the environment. It helps keep rivers and lakes healthy and reduces energy used for water treatment.
- Increase water use awareness
- Encourage saving habits
- Protect natural water sources
- Lower energy use for water
Choosing The Right Sensors
Picking the right sensors is key for a smart home water monitor. Sensors detect water flow and pressure. This helps track water use accurately.
Choose sensors that fit your home’s plumbing. Sensors should be easy to install and reliable. Let’s look at common sensor types.
Flow Sensors
Flow sensors measure how much water moves through a pipe. They use different methods like turbine or ultrasonic to detect flow.
Turbine flow sensors have a small wheel that spins with water flow. Ultrasonic sensors use sound waves to measure flow without touching water.
- Turbine sensors are cost-effective and simple.
- Ultrasonic sensors have no moving parts and need less maintenance.
- Choose sensors that fit your pipe size and water type.
Pressure Sensors
Pressure sensors check water pressure inside pipes. They help find leaks or blockages early. Constant pressure monitoring protects your system.
Look for pressure sensors with high accuracy. Sensors should handle your home’s maximum water pressure safely.
- Choose sensors with digital outputs for easy data use.
- Pick models with waterproof design for durability.
- Check sensor compatibility with your water system.
Smart Meter Integration
Smart meters track total water use and send data wirelessly. They work well with sensors to give a full picture of water use.
Pick smart meters that connect easily to your home network. Look for meters with apps or web portals for easy monitoring.
- Choose meters with real-time data updates.
- Look for models supporting multiple sensor types.
- Consider meters that offer alerts for unusual water use.
Essential Components For Diy Setup
Building a smart home water usage monitor needs some key parts. These parts help you measure, send, and power the data.
Knowing these parts makes your project easier and helps you pick what fits best.
Microcontrollers And Boards
Microcontrollers are small computers that control your water monitor. They read sensor data and send it to your phone or computer.
Popular boards include Arduino and ESP32. Arduino is simple for beginners. ESP32 has Wi-Fi and Bluetooth built-in.
- Arduino Uno: Easy to use, many tutorials available
- ESP32: Built-in Wi-Fi and Bluetooth for wireless data
- Raspberry Pi Pico: More powerful, supports complex tasks
Connectivity Options
Your water monitor needs to send data wirelessly or with wires. Pick the right connection for your home setup.
Wi-Fi is common for smart homes. Bluetooth works well for short distances. Wired options like USB or Ethernet are more stable.
- Wi-Fi: Connects to home network, good for remote access
- Bluetooth: Simple pairing, best for nearby devices
- Zigbee/Z-Wave: Low power, works with smart home hubs
- Wired (USB/Ethernet): Reliable but less flexible
Power Supply Considerations
Your device needs a steady power source. Think about batteries or plugs depending on where you place it.
Battery power allows placing the monitor anywhere but needs recharging. Plug-in power is constant but limits location.
- Rechargeable batteries: Portable, need regular charging
- AA or AAA batteries: Cheap but replace often
- Power adapters: Use wall outlets, no battery worries
- Solar panels: Good for outdoor setups with sunlight
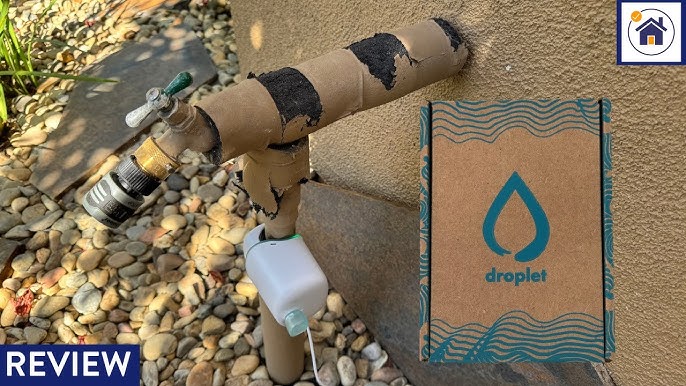
Credit: www.youtube.com
Step-by-step Installation Guide
This guide helps you install a DIY smart home water usage monitor. It explains all steps clearly.
Follow each section to set up your monitor for accurate water tracking at home.
Preparing The Plumbing
Turn off the main water supply before starting any work. This stops water flow safely.
Find a straight section of pipe to install the sensor. Clean this area well to remove dirt.
- Locate the main water line or the pipe you want to monitor
- Turn off water supply at the main valve
- Dry and clean the pipe surface
- Measure pipe diameter for sensor fit
Installing Sensors
Attach the water flow sensor to the pipe securely. Use clamps or adhesive as needed.
Make sure the sensor wires are not loose. Keep them away from water and sharp edges.
- Place sensor around the pipe in the correct direction
- Fix sensor tightly with provided straps or clamps
- Route sensor wires carefully to the controller area
- Check for secure connections and no wire damage
Connecting To The Controller
Connect sensor wires to the controller input ports. Match the wire colors to the labels.
Power on the controller and check for sensor signals. Follow controller instructions for setup.
- Plug sensor cables into controller input ports
- Connect controller to power source
- Turn on the system and watch for sensor activity
- Use controller app or display to verify readings
Programming Your Monitor
Programming your DIY smart home water usage monitor is key to tracking water flow accurately. It helps you collect data and respond to changes in water use.
This guide explains how to read sensor data, save it, and set alerts for unusual water use.
Reading Sensor Data
Your monitor reads data from water flow sensors or pressure sensors. These sensors send electrical signals that show how much water is used.
You program your device to convert these signals into numbers. These numbers tell you the water flow rate or total usage.
- Use analog or digital input pins to get sensor signals
- Convert analog signals with an ADC (Analog to Digital Converter)
- Apply formulas to calculate flow rate from sensor data
- Update readings every few seconds for accuracy
Data Logging And Storage
Logging data helps you track water use over time. You store readings in memory or on an external device.
Common storage options include SD cards, cloud services, or internal memory. Choose one based on your project size and needs.
- Save data in CSV or JSON file formats
- Log data at regular time intervals
- Use timestamps to know when data was recorded
- Ensure enough storage space for long-term logging
Setting Alerts And Notifications
Alerts warn you of leaks or unusual water use. You program your monitor to check data against set limits.
When water use is too high or low, the system sends notifications by email or mobile apps.
- Define threshold values for normal water flow
- Use conditional statements to detect anomalies
- Connect your monitor to Wi-Fi for notifications
- Send alerts via SMS, email, or app messages
Mobile And Web Interfaces
The DIY smart home water usage monitor offers easy-to-use mobile and web interfaces. These interfaces help you watch water use anytime and anywhere.
You can check your water data on your phone or computer. Both interfaces are made to be simple and clear for all users.
Real-time Usage Tracking
The monitor shows your water use as it happens. You can see how much water you use every minute or hour.
Real-time data helps you find leaks or waste fast. The interface updates live to keep you informed.
- Live water flow rate display
- Instant alerts for unusual use
- Easy-to-read graphs and numbers
Historical Data Visualization
The system saves past water data for you to review. You can see daily, weekly, or monthly water use patterns.
Graphs and charts help you understand your water habits. This can guide you to save water and lower bills.
- Bar charts for daily use
- Line graphs for weekly trends
- Pie charts to compare water sources
Customizing User Settings
You can set your own preferences in the app or website. This lets you get alerts and data in ways that fit you.
Settings include notification options, display themes, and measurement units. You control how the system works for you.
- Set alert thresholds for water use
- Choose metric or imperial units
- Select light or dark mode display
- Manage multiple water meters
Advanced Features To Consider
A DIY smart home water usage monitor can do more than just track water use. Advanced features help you save water and spot issues early.
These features make your water system smarter and easier to control. They also give you useful data to manage water better.
Automated Valve Control
Automated valve control lets your system turn water on or off by itself. It can stop leaks or shut off water when not needed.
This feature adds safety and saves water by reacting fast to problems without waiting for you.
- Shuts off water during leaks
- Controls water flow to appliances
- Can schedule valve opening and closing
Integration With Home Automation
Integration with home automation lets your water monitor work with other smart devices. You get a complete smart home system.
You can control water use from your phone or voice assistant. This makes managing water easy and hands-free.
- Works with smart speakers like Alexa or Google
- Links to smart thermostats and lights
- Allows remote monitoring and control
Usage Forecasting And Analytics
Usage forecasting predicts how much water you will use in the future. Analytics show patterns and help find waste.
These tools help you plan water use and spot unusual changes early. You can save money and protect your home.
- Daily, weekly, and monthly water use reports
- Alerts for unusual water use patterns
- Suggestions to reduce water waste

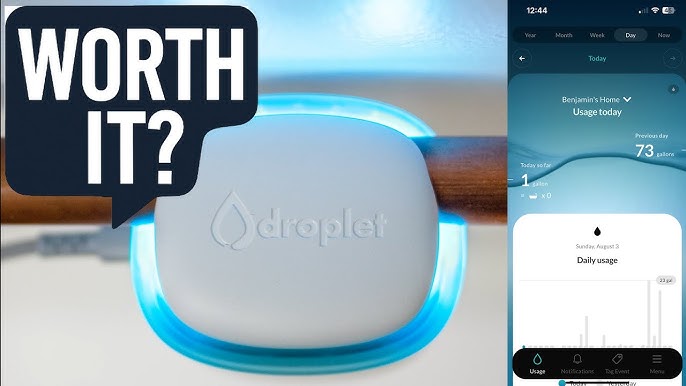
Credit: www.amazon.com
Maintenance Tips For Longevity
Keeping your DIY smart home water usage monitor in good shape helps it last longer. Regular care ensures accurate readings and smooth operation.
Simple maintenance tasks can prevent problems and save money on repairs. Follow these tips to extend your monitor’s life.
Regular Sensor Calibration
Calibration keeps the sensors accurate over time. Check the sensor readings regularly and adjust them as needed.
Follow the instructions from the manufacturer or calibration tool to reset the sensors. This helps avoid errors in water usage data.
- Test sensors monthly for accuracy
- Use calibration kits or software
- Record calibration dates and results
Firmware Updates
Keep your device’s firmware up to date. Updates improve performance and fix bugs that may affect your monitor.
Check the device app or website regularly for new updates. Follow the update steps carefully to avoid interruptions.
- Set reminders to check for updates
- Backup settings before updating
- Restart the device after update
Troubleshooting Common Issues
Problems like inaccurate data or connection loss can occur. Identify the issue quickly to keep your monitor working well.
Try simple fixes like restarting the device or checking the Wi-Fi connection. If problems persist, consult the user guide.
- Reset the device if it stops responding
- Check for sensor blockages or leaks
- Ensure power supply is stable
Cost Analysis And Savings
Building a DIY smart home water usage monitor can save money over time. It helps track water use and reduce waste.
Understanding the costs and savings helps decide if the project fits your budget.
Initial Investment Breakdown
The first cost is buying parts like sensors and a microcontroller. You may also need tools and wiring.
Some parts can be reused from old devices to lower expenses.
- Water flow sensor: $15–$25
- Microcontroller (e.g., Arduino or ESP32): $10–$30
- Display or app interface: $0–$20
- Cables and connectors: $5–$10
- Power supply: $5–$15
Long-term Financial Benefits
Tracking water use can reduce bills by catching leaks and lowering waste.
Small savings add up over months and years, paying back the initial cost quickly.
- Detect leaks early to avoid high costs
- Use water efficiently to lower monthly bills
- Set alerts to prevent overuse
- Save 10–20% on water costs
Environmental Impact
Using less water helps protect natural resources. It lowers energy used in water treatment.
Smart monitoring supports a cleaner environment by reducing unnecessary water waste.
- Conserve water for future use
- Lower energy used in pumping and heating
- Reduce strain on local water supplies
- Support sustainability efforts at home

Credit: www.reddit.com
Frequently Asked Questions
What Is A Diy Smart Home Water Usage Monitor?
A DIY smart water usage monitor tracks water flow at home. It helps save water and reduce bills by providing real-time data. Users can install it themselves using affordable sensors and apps, making it an eco-friendly and cost-effective solution.
How Does A Smart Water Usage Monitor Work?
It uses sensors to measure water flow through pipes. The data is sent to a smart device or app. The monitor tracks usage patterns and alerts users about leaks or excessive consumption for efficient water management.
What Are The Benefits Of A Diy Water Monitor?
DIY monitors reduce water waste and lower utility bills. They provide real-time insights and leak detection. This helps prevent damage and promotes sustainable water use. DIY installation is cost-effective and customizable for any home setup.
Can I Integrate The Water Monitor With Smart Home Systems?
Yes, many DIY water monitors support integration with smart home hubs. They work with platforms like Alexa, Google Home, or SmartThings. This enables voice control, automation, and centralized water usage management for convenience.
Conclusion
Building a DIY smart home water usage monitor is simple. It helps you save water. You can track usage easily and efficiently. This project is budget-friendly and rewarding. You gain control over water consumption at home. It also helps reduce water bills.
The environment benefits from less water waste. You contribute to a greener planet. With basic tools, you can start today. You’ll enjoy the satisfaction of this smart upgrade. Keep your home smart and efficient with this simple project.
24 min read