
Imagine turning your home into a smart, connected space without spending a fortune or relying on complicated gadgets. With the ESP32, you have the power to create your own DIY smart home system tailored exactly to your needs.
Whether you want to control lights, monitor sensors, or automate daily tasks, this tiny device can do it all. Ready to take control, save money, and add a touch of tech magic to your living space? Keep reading, and discover how easy and fun building your smart home with ESP32 can be.
Why Choose Esp32 For Smart Homes
The ESP32 is a popular choice for building smart home devices. It has many features that make it easy to use and powerful.
This microcontroller helps connect devices in your home to the internet. It supports Wi-Fi and Bluetooth, which are key for smart devices.
Key Features Of Esp32
The ESP32 has built-in Wi-Fi and Bluetooth. This lets your smart devices communicate wirelessly.
It has a dual-core processor that runs tasks fast. It also has many input and output pins for sensors and actuators.
- Dual-core 32-bit processor for better speed
- Built-in Wi-Fi and Bluetooth for wireless control
- Multiple GPIO pins for connecting sensors
- Low power consumption for energy efficiency
- Supports various communication protocols like SPI and I2C
Benefits Over Other Microcontrollers
The ESP32 offers more features than many other microcontrollers. It combines wireless communication and processing power in one chip.
It is affordable and easy to program. Many developers use it, so there are many resources and libraries available.
- Better connectivity with Wi-Fi and Bluetooth included
- More processing power for complex smart home tasks
- Wide community support and many tutorials
- Cost-effective compared to separate Wi-Fi modules
- Flexible power modes for battery-powered devices
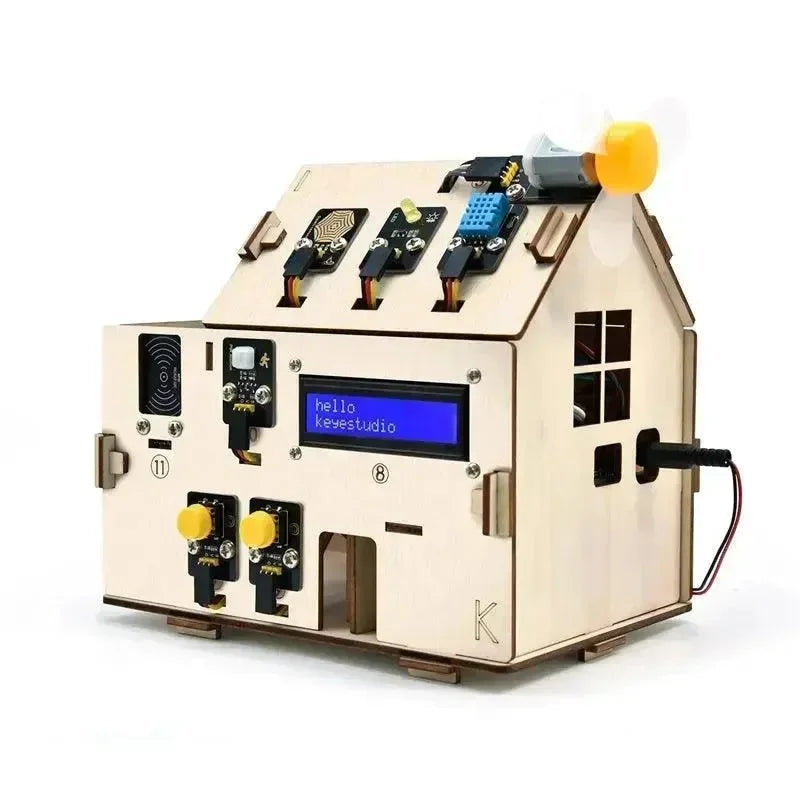
Essential Components For Diy Smart Home
Building a smart home with ESP32 needs some key parts. These parts help your home sense, act, and connect.
Knowing these components helps you make a simple and useful smart home system.
Sensors And Actuators
Sensors gather information from the environment. Actuators make changes based on commands.
Common sensors include temperature, light, and motion sensors. Actuators can be motors, relays, or LED lights.
- Temperature sensors measure heat levels
- Motion sensors detect movement
- Light sensors check brightness
- Relays control high power devices
- Motors help move physical parts
Power Supply Options
Your smart home devices need steady power to work well. Choose the right power source for your project.
Power can come from batteries, USB, or adapters. Each has pros and cons for different setups.
- Batteries give wireless freedom
- USB power is easy and common
- Adapters provide constant power
- Power banks help during outages
Connectivity Modules
ESP32 has built-in Wi-Fi and Bluetooth. Other modules can expand how devices connect.
Good connectivity helps devices talk to each other and to your phone or computer.
- Wi-Fi allows internet access
- Bluetooth links nearby devices
- Zigbee and Z-Wave support smart home networks
- Ethernet gives stable wired connection
Setting Up The Esp32 Environment
Setting up the ESP32 environment is the first step for your smart home project. This setup helps you write and upload code to the ESP32 chip.
You need to install tools, configure the board, and learn basic programming tips. This guide will explain these steps clearly.
Installing Development Tools
First, install the software needed to program the ESP32. The most popular tool is the Arduino IDE. It is free and easy to use.
You also need drivers so your computer can communicate with the ESP32. These drivers depend on your computer system.
- Download Arduino IDE from the official website
- Install USB drivers for the ESP32 board
- Restart your computer after installation
- Open Arduino IDE and prepare for board setup
Configuring The Esp32 Board
Next, add ESP32 board support to Arduino IDE. This step allows the IDE to understand ESP32 hardware.
After adding support, select the right board and port before uploading code. This ensures code goes to your device correctly.
- Open Arduino IDE preferences
- Add ESP32 URL in the Additional Boards Manager URLs
- Go to Tools > Board > Boards Manager
- Search for ESP32 and install the package
- Select your ESP32 board model from Tools > Board
- Choose the correct COM port under Tools > Port
Basic Programming Tips
Start with simple programs to test your ESP32. Use example sketches in Arduino IDE for easy learning.
Keep your code clean and add comments. This helps you understand your work later and avoid mistakes.
- Use built-in examples like Blink or WiFi Scan
- Write clear comments for each section of code
- Test your program often to find errors early
- Keep functions small and simple

Credit: openelab.io
Creating Basic Automation Projects
Using the ESP32 microcontroller, you can build simple smart home projects. These projects help you control devices and monitor your home.
Basic automation improves comfort and saves energy. You can start with lights, temperature, and motion detection.
Controlling Lights Remotely
The ESP32 can turn lights on or off from anywhere. You connect it to a relay that controls the light switch.
Use a mobile app or web interface to send commands to the ESP32. This makes it easy to control your lights remotely.
- Connect a relay module to the ESP32
- Write code to switch the relay on and off
- Set up Wi-Fi to receive remote commands
- Create a simple app or web page to control lights
Temperature Monitoring
The ESP32 can read temperature data using sensors like the DHT11 or DS18B20. This helps you track room temperature.
You can display temperature on a screen or send it to your phone. This project helps you keep your home comfortable.
- Attach a temperature sensor to the ESP32
- Program the ESP32 to read sensor data
- Send temperature info to a screen or app
- Set alerts for high or low temperatures
Motion Detection Setup
You can use a PIR sensor with the ESP32 to detect motion. This helps with home security or automatic lighting.
The ESP32 sends alerts or turns lights on when it detects movement. This makes your home smarter and safer.
- Connect a PIR motion sensor to ESP32
- Write code to detect sensor signals
- Trigger actions like sending alerts or turning lights on
- Test the system to ensure it works well
Integrating Voice Assistants
Using voice assistants with your DIY smart home makes control easy. The ESP32 board can connect to popular voice platforms.
This guide covers how to link your ESP32 smart home with Alexa, Google Assistant, and custom voice commands.
Connecting With Alexa
Alexa works well with ESP32 through cloud services. Use Amazon Alexa Skills Kit to build a skill for your device.
Set up MQTT or HTTP communication between Alexa and ESP32 for smooth control of lights, sensors, and more.
- Create an Alexa skill in the Amazon Developer Console
- Use AWS Lambda to handle Alexa requests
- Program ESP32 to respond to MQTT or HTTP commands
- Test commands like “Turn on the living room light”
Using Google Assistant
Google Assistant connects with ESP32 using Google Actions and Firebase or other cloud services. This lets you control devices by voice.
Use Dialogflow to create conversational commands. ESP32 listens to cloud messages and acts accordingly.
- Set up a project in Google Cloud Console
- Create Google Actions linked to your smart home
- Use Firebase or MQTT to send commands to ESP32
- Test phrases like “Set the thermostat to 22 degrees”
Custom Voice Commands
You can build custom voice commands directly on ESP32 using offline speech recognition. This is good for simple tasks.
Use libraries like ESP-Speech or connect a microphone to capture and process voice commands locally.
- Install speech recognition libraries on ESP32
- Train simple keywords like “light on” or “fan off”
- Program ESP32 to perform actions based on detected words
- Works without internet and improves privacy
Credit: www.youtube.com
Enhancing Security Features
Building a DIY smart home with ESP32 can improve your home’s safety. You can add many security features using simple tools.
ESP32 lets you control cameras, locks, and alarms. These features work together to protect your home.
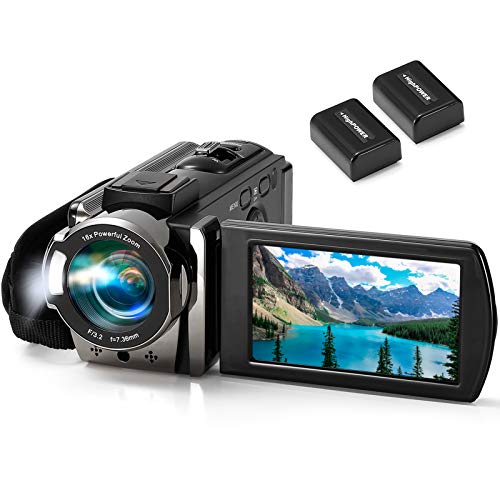
Setting Up Surveillance Cameras
Use ESP32 to connect and control security cameras. These cameras can send live video to your phone or computer.
Choose cameras that work well with ESP32. Place them near doors and windows for best coverage.
- Connect cameras to Wi-Fi with ESP32
- Stream video to your device in real time
- Record footage when motion is detected
- Use infrared cameras for night vision
Implementing Door Locks
Smart door locks can keep your home safe and let you control access remotely. ESP32 can manage these locks easily.
Install electronic locks that connect to ESP32. You can lock or unlock doors using a smartphone app.
- Use ESP32 to control lock motors or solenoids
- Set up password or RFID access
- Receive alerts when doors open or close
- Program temporary access codes for guests
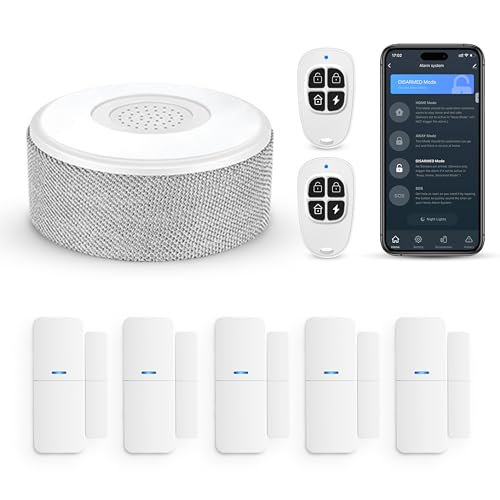
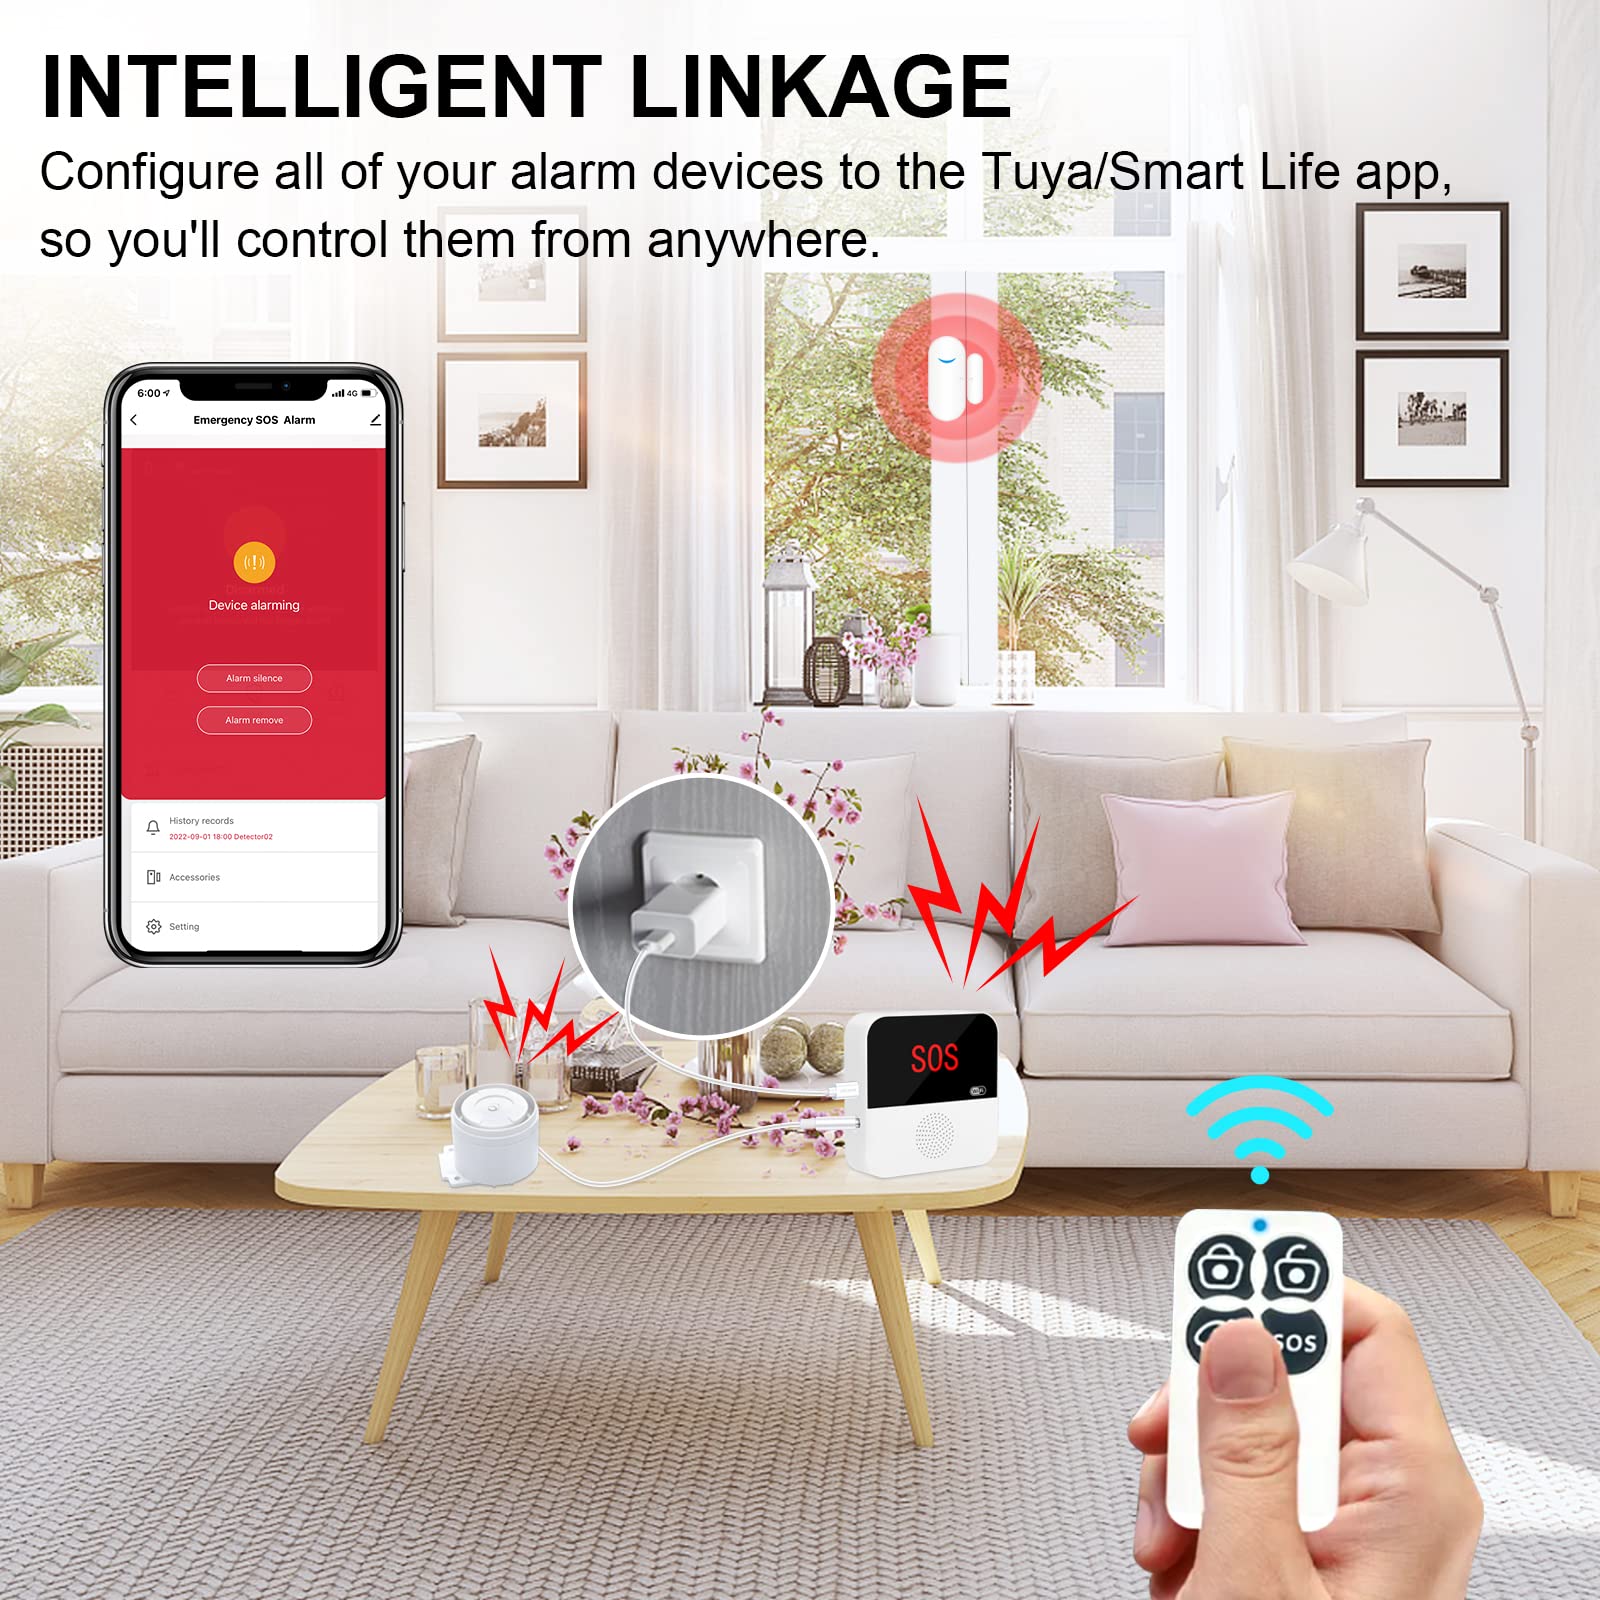
Alarm Systems Integration
ESP32 can connect alarm sensors to alert you of danger. Alarms can warn you about break-ins or fires.
Link motion detectors, smoke sensors, and sirens to ESP32. The system can send notifications and sound alarms.
- Connect PIR motion sensors to detect movement
- Use smoke and gas sensors for fire safety
- Trigger sirens or lights when alarms go off
- Send instant alerts to your phone
Optimizing Power Consumption
Building a DIY smart home with ESP32 needs careful power use. Saving power helps your devices run longer and stay efficient.
ESP32 offers features to reduce power use. Using these well lets your smart home work without wasting energy.
Sleep Modes And Power Saving
ESP32 has several sleep modes to cut power use. In sleep mode, the chip uses very little energy while still running.
Deep Sleep mode is the most effective. It turns off most functions and wakes up only when needed.
- Light Sleep: CPU pauses, RAM stays powered
- Deep Sleep: CPU and RAM off, timer or external wake-up
- Modem Sleep: Wi-Fi off, CPU on
Efficient Sensor Usage
Using sensors smartly saves power in your smart home. Turn sensors on only when you need data.
Choose sensors that use less power and set them to sleep or low-power modes. This reduces energy waste.
- Use interrupts to wake ESP32 only on sensor events
- Reduce sensor sampling rates to save power
- Power sensors off when not in use
- Pick sensors with low current consumption
Troubleshooting Common Issues
Building a DIY smart home with ESP32 can be fun and useful. Sometimes, issues arise during setup or use. Knowing how to fix common problems helps keep your project running smoothly.
This guide covers common problems like connectivity, programming, and hardware faults. It explains simple ways to find and fix these issues.
Connectivity Problems
Connectivity issues often stop your ESP32 from talking to your Wi-Fi or other devices. Weak signals, wrong passwords, or network changes can cause problems.
Check your Wi-Fi name and password carefully. Make sure your router is working and the ESP32 is close enough to the signal. Restart devices if needed.
- Verify Wi-Fi credentials are correct
- Move ESP32 closer to the router
- Restart router and ESP32
- Check for network interference
- Update ESP32 firmware
Programming Errors
Programming errors can stop your ESP32 from working as expected. Code mistakes or wrong settings cause bugs or crashes.
Use simple code and test often. Look for typos, missing parts, or wrong pin numbers. Use the serial monitor to find error messages.
- Check syntax and spelling in your code
- Confirm correct pin assignments
- Use serial monitor for error logs
- Test code in small pieces
- Update your programming tools
Hardware Malfunctions
Hardware issues happen if parts do not connect well or get damaged. Loose wires, bad sensors, or faulty power can cause problems.
Check all connections and wires. Replace damaged parts. Use a stable power supply that meets ESP32 requirements.
- Inspect wires for loose or broken connections
- Test sensors and modules separately
- Use correct voltage and current power supply
- Replace faulty hardware parts
- Keep hardware clean and dry
Expanding Your Smart Home Network
Building a smart home with ESP32 is fun and useful. You can add many devices to make your home smarter.
Expanding your smart home network means connecting more devices and improving communication. This helps your devices work well together.
Adding More Devices
You can add sensors, lights, switches, and cameras to your ESP32 network. Each device adds new features to your smart home.
Make sure each device has a unique ID and connects to your Wi-Fi or Bluetooth. This keeps your network organized and stable.
- Use ESP32 modules for different rooms
- Connect sensors for temperature and motion
- Add smart lights and switches
- Include cameras for security
Using Mqtt For Communication
MQTT is a simple way for devices to talk to each other. It uses a central broker to send messages between devices.
ESP32 devices can publish data to topics and subscribe to others. This keeps data flowing smoothly and quickly.
- MQTT broker handles message delivery
- Devices publish sensor data or commands
- Devices subscribe to control messages
- Low power and fast communication
Cloud Integration Options
Connecting your ESP32 network to the cloud lets you control devices from anywhere. The cloud stores data and runs apps.
You can choose cloud services that support MQTT or HTTP. This helps you monitor and manage your smart home remotely.
- Use cloud platforms with MQTT support
- Access your devices via mobile apps
- Store sensor data for analysis
- Set up alerts and automation rules

Credit: openelab.io
Frequently Asked Questions
What Is Esp32 In A Diy Smart Home?
ESP32 is a low-cost microcontroller with Wi-Fi and Bluetooth. It enables smart home devices to connect and communicate wirelessly. It’s ideal for DIY projects due to its versatility and ease of programming.
How Does Esp32 Control Smart Home Devices?
ESP32 controls devices by sending signals through Wi-Fi or Bluetooth. It can switch lights, sensors, and appliances on or off remotely. This allows automated and manual control of your smart home system.
Can Esp32 Integrate With Popular Smart Home Platforms?
Yes, ESP32 can integrate with platforms like Home Assistant and Alexa. It supports MQTT and HTTP protocols for seamless communication. This enhances your smart home’s functionality and compatibility.
What Are The Power Requirements For Esp32 In Smart Homes?
ESP32 typically operates at 3. 3V and consumes low power. It’s energy-efficient, making it suitable for battery-powered or always-on smart devices. Proper power management extends device lifespan and reliability.
Conclusion
Building a smart home with ESP32 is simple and rewarding. This project saves money and offers customization. You can control lights, temperature, and security easily. Enjoy comfort and convenience at your fingertips. With basic tools and patience, transform your home.
ESP32 makes automation accessible for everyone. You learn and grow with each step. Explore endless possibilities and enjoy a smarter home. Anyone can start this journey with minimal investment. Dive into the world of home automation today. Make life simpler and more efficient.
Your smart home awaits!
24 min read