
Are you tired of struggling with poor lighting when you want to enjoy your favorite book? Imagine having a smart light that pops up exactly when you need it, giving you perfect reading light without any hassle.
This DIY smart light popup is designed just for you, making your reading time easier and more comfortable. Keep reading, and you’ll discover how simple it is to create your own smart reading light that fits your space and style perfectly.
Your eyes will thank you!
Choosing The Right Materials
Building a DIY smart light popup for reading needs the right materials. Picking good parts helps your project work well and last long.
Choose materials that are safe and fit your design. This guide covers key parts for your smart light popup.
Selecting Led Lights
LED lights are the heart of your reading popup. Pick LEDs that give soft, warm light to protect your eyes.
Look for LEDs with low power use and good brightness. Make sure the size fits your popup frame.
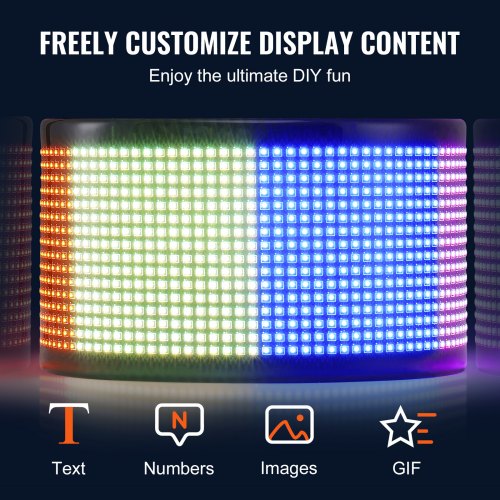
- Choose warm white or soft yellow LEDs
- Check brightness levels (around 300-500 lumens)
- Pick low power LEDs for energy saving
- Make sure LEDs fit the popup size
Picking The Power Source
The power source keeps your smart light working. Choose between batteries or USB power based on your needs.
Batteries offer portability but need replacement. USB power is steady but needs a cable connection.
- Use rechargeable batteries for long use
- USB power works well for home use
- Consider power size to match LEDs
- Pick a power source that fits your popup design
Finding Suitable Switches
Switches control your light popup easily. Choose simple on/off switches or touch sensors for smart control.
Switches should be easy to use and fit in your popup frame without trouble.
- On/off toggle switches are simple and reliable
- Touch sensors add a modern touch
- Pick switches that match your power source
- Make sure the switch fits your popup size
Materials For The Popup Frame
The popup frame holds all parts together. Use strong, light materials that are easy to cut and shape.
Materials like cardboard, thin wood, or plastic work well for making a sturdy frame.
- Cardboard is cheap and easy to work with
- Thin plywood is strong and looks nice
- Acrylic plastic adds a modern style
- Use glue or small screws to join parts
Credit: www.vevor.com
Tools You’ll Need
Building a DIY smart light popup for reading needs some tools. These tools help you work safely and make the project easier.
We will look at two groups of tools: basic electronics tools and crafting and assembly tools. Each group has important items.
Basic Electronics Tools
Basic electronics tools help you handle wires, connect parts, and test your smart light’s circuit. These tools make sure your electronics work well.
- Soldering iron – joins wires and components securely
- Wire cutters – cut wires to the right length
- Wire strippers – remove insulation from wires safely
- Multimeter – checks voltage, current, and resistance
- Helping hands tool – holds small parts steady while you work
- Heat shrink tubing – protects and insulates wire connections
Crafting And Assembly Tools
These tools help shape and put together the physical parts of your smart light popup. They help you build the frame and attach electronics neatly.
- Hot glue gun – fast and strong glue for parts
- Screwdriver set – for screws of different sizes
- Utility knife – cuts materials like plastic and cardboard
- Ruler and measuring tape – measure parts accurately
- Sandpaper – smooths rough edges on materials
- Small clamps – hold pieces together while glue dries
Designing The Popup Mechanism
Creating a popup mechanism for a DIY smart light can improve your reading experience. It lets you fold or unfold the light easily. The design should be simple and reliable.
The popup mechanism needs to hold the light steady while in use. It should also fold compactly for storage or travel.
Simple Foldable Designs
Foldable designs use hinges or flexible joints to open and close the light. These designs are easy to build and use few parts.
You can use cardboard, plastic, or thin wood for the foldable parts. Make sure the folds are strong but smooth to move.
- Use metal or plastic hinges for durability
- Add rubber pads to prevent slipping when open
- Design folds to protect the light surface
- Test the folding angle for comfortable lighting
Compact And Portable Ideas
Portable popup lights should be small and light. This makes them easy to carry in bags or pockets.
Design the popup to collapse flat or into a small shape. Use lightweight materials like plastic or thin aluminum.
- Choose a fold-flat design for easy packing
- Include a locking mechanism to keep it closed
- Use rechargeable batteries for portability
- Add a clip or strap for easy attachment
Wiring The Electronics
Wiring the electronics is a key part of building your DIY smart light popup. Proper wiring ensures your light works well and stays safe.
Take your time to connect each part carefully. This guide helps you wire the LEDs, switches, and power connections correctly.
Connecting Leds And Switches
Start by connecting the LEDs to the circuit board or breadboard. Use the correct pins for positive and negative leads to avoid damage.
Attach the switches so they can control the LEDs. The switch should break or complete the circuit to turn the light on or off.
- Identify LED positive (anode) and negative (cathode) legs
- Connect LED anode to power through a resistor
- Connect LED cathode to ground
- Wire one side of the switch to power source
- Connect the other side of switch to LED circuit
Ensuring Safe Power Connections
Use the right power source for your LEDs and electronics. Check the voltage and current ratings to prevent damage.
Secure all power wires and avoid loose connections. Loose wires can cause shorts or sparks, which are dangerous.
- Choose a power supply with correct voltage (usually 5V or 12V)
- Use resistors to limit LED current
- Connect ground wires firmly
- Use insulated wires to prevent short circuits
- Double-check all connections before powering on
Building The Frame
Building the frame is the first step in making your DIY smart light popup. The frame holds all parts together and gives the light its shape.
You will need simple tools and materials to create a strong frame that fits your smart light design.
Cutting And Assembling Materials
Start by cutting the materials to the right size. Use wood, plastic, or acrylic sheets for the frame parts. Measure carefully before cutting.
After cutting, join the pieces using glue or small screws. Make sure the frame is sturdy and all parts fit well.
- Measure all parts twice before cutting
- Use a saw or cutter suitable for your material
- Sand edges to avoid sharp corners
- Assemble pieces firmly with screws or glue
- Check the frame for stability
Securing The Electronics Inside
Place the smart light electronics inside the frame carefully. Arrange wires and components so nothing moves or gets damaged.
Use small brackets or foam pads to hold parts in place. Ensure easy access to buttons or charging ports.
- Position the light module securely
- Organize wires neatly to avoid tangles
- Use foam or clips to fix parts
- Leave space for ventilation
- Test the electronics before closing the frame

Credit: www.amazon.com
Testing And Adjustments
Testing your DIY smart light popup is important. It helps you see if the light works well for reading.
Adjustments improve the light’s brightness and fix any issues with the popup’s parts.
Checking Light Brightness
Turn on the light and check if it is bright enough. It should provide clear light without hurting your eyes.
Test the light in different room settings to see if it works well. Adjust the brightness level if needed.
- Use a dimmer switch to change brightness
- Make sure the light covers your reading area
- Avoid glare or harsh shadows on your book
Fixing Mechanical Issues
Check the popup mechanism to ensure smooth movement. It should open and close without sticking or noise.
If parts feel loose or tight, adjust screws or hinges carefully. Make sure all parts fit well and move freely.
- Tighten loose screws to avoid wobbling
- Lubricate hinges if the popup is stiff
- Replace broken parts for smooth operation
Customization Tips
Customizing your DIY smart light popup for reading makes it fit your style. You can change colors and brightness to suit your mood.
These tips help you make your reading light more useful and fun. Small changes can improve your reading comfort a lot.
Adding Color Filters
Color filters change the light’s shade. They help reduce eye strain during long reading sessions.
You can use colored gels or smart bulbs that let you pick colors from an app. This adds a personal touch.
- Use soft blue or green filters to relax your eyes
- Red filters help keep your room dark at night
- Try warm colors for a cozy reading vibe
- Switch colors based on the time of day
Incorporating Dimming Features
Dimming lets you adjust light brightness. This helps you find the perfect light level for reading.
You can add a dimmer switch or use smart bulbs with built-in dimming. It saves energy and protects your eyes.
- Install a rotary dimmer for smooth brightness changes
- Use touch-sensitive dimmers for easy control
- Set timers to dim lights automatically
- Combine dimming with color filters for better comfort

Credit: www.reddit.com
Using Your Smart Light Popup
The Smart Light Popup is a small, portable light designed to help you read comfortably. It gives soft, bright light that reduces eye strain.
You can place the popup near your book or e-reader. It works well in dark rooms or places with low light.
Best Reading Practices
Set the Smart Light Popup at a good angle to avoid glare. Keep the light shining on the page, not in your eyes.
Use the right brightness level. Too bright or too dim light can tire your eyes quickly.
- Position light about 12 inches from the reading surface
- Adjust brightness to a comfortable level
- Use warm light settings for long reading sessions
- Take breaks every 30 minutes to rest your eyes
Maintaining The Device
Keep your Smart Light Popup clean for the best light quality. Wipe it gently with a soft, dry cloth.
Charge the device regularly to avoid sudden power loss. Store it in a safe place when not in use to prevent damage.
- Use a microfiber cloth for cleaning
- Do not use water or cleaning sprays directly on the device
- Charge the battery fully before first use
- Keep away from extreme heat or moisture
Frequently Asked Questions
What Materials Are Needed For A Diy Smart Light Popup?
You need LED strips, microcontroller, power source, sensors, wires, and a popup mechanism. These materials are affordable and easy to find. They ensure your smart light popup works efficiently for reading purposes.
How Do Smart Light Popups Improve Reading Experience?
Smart light popups provide adjustable brightness and color temperature. This reduces eye strain and enhances focus. They automatically adapt to ambient light, making reading comfortable in any environment.
Can I Control The Diy Smart Light Remotely?
Yes, you can control it via smartphone apps or voice assistants. This adds convenience and customization to your reading setup. Remote control allows easy adjustments without interrupting your reading flow.
Is It Difficult To Assemble A Diy Smart Light Popup?
No, the assembly is straightforward with basic electronics knowledge. Clear instructions and tutorials simplify the process. It’s a rewarding project for both beginners and experienced DIYers.
Conclusion
Creating a DIY smart light popup for reading is rewarding. Simple tools and steps make it possible. This project enhances your reading experience. The light adjusts to your needs and mood. It’s cost-effective and easy to assemble. Enjoy a cozy reading nook anytime.
The personal touch adds charm and functionality. Explore your creativity. Share the joy of crafting with others. Perfect for book lovers and DIY enthusiasts alike. Happy crafting!
19 min read