Imagine walking into a dark room and having the lights turn on automatically, just as you step inside. No more fumbling for switches or worrying about energy waste.
With DIY smart motion-activated lights, you can bring this convenience into your home quickly and affordably. If you want to save energy, boost your home’s security, and add a touch of modern ease to your daily routine, this guide is made for you.
Keep reading to discover how simple it is to create your own smart lighting system that reacts to your every move.
Benefits Of Motion-activated Lights
Motion-activated lights turn on automatically when they detect movement. This feature makes them useful for many home situations.
These lights help save energy, improve safety, and add convenience. They are easy to install and use in your home.
Enhancing Home Security
Motion-activated lights scare off intruders by lighting up when someone approaches. This can reduce the risk of theft or vandalism.
They also alert homeowners to movement outside. This helps you notice visitors or unexpected activity near your home.
- Lights turn on only when needed
- Helps detect suspicious activity
- Works as a simple security tool
Energy Efficiency Advantages
Motion-activated lights use energy only when someone is nearby. They do not stay on all night or day.
This saves electricity and lowers your energy bills. It is better for the environment and your wallet.
- Reduces wasted electricity
- Uses power only when needed
- Helps lower monthly energy costs
Convenience And Automation
Motion-activated lights turn on automatically. You do not have to find a switch in the dark.
This makes it easier to move around your home safely at night. It adds comfort and saves time.
- Lights activate without manual effort
- Improves safety when carrying items
- Works well for outdoor and indoor areas
Choosing The Right Components
Building a DIY smart motion-activated light system needs the right parts. Picking good components helps the system work well and last long.
Focus on sensors, lights, and power sources. Each part plays a key role in how your system performs.
Selecting Motion Sensors
Motion sensors detect movement and turn lights on. Choose sensors that fit your space and needs. Look for sensors with good range and angle.
Infrared sensors are common and work well indoors. Ultrasonic sensors can detect motion through obstacles. Some sensors combine both for better detection.
- Check sensor range (short, medium, long)
- Consider sensor detection angle
- Choose sensor type: infrared, ultrasonic, or dual
- Look for adjustable sensitivity settings
Picking Suitable Light Fixtures
Select light fixtures that match the place you want to light. Outdoor lights need to be weatherproof. Indoor lights have more design options.
LED lights are energy-saving and bright. Choose warm or cool white light depending on the mood you want. Make sure the light is easy to install with your sensor.
- Pick outdoor or indoor rated fixtures
- Choose LED lights for energy efficiency
- Decide light color: warm or cool white
- Match fixture size to installation area
Power Sources And Connectivity Options
Power your lights with options like batteries, wired electricity, or solar panels. Each power source has pros and cons for your setup.
Smart lights can connect to Wi-Fi or use simple switches. Wi-Fi lets you control lights with apps. Simple setups use motion sensors to turn lights on and off automatically.
- Battery power: easy install, needs replacement
- Wired power: reliable, needs wiring work
- Solar power: eco-friendly, depends on sunlight
- Wi-Fi connectivity: control via smartphone
- Basic sensor switch: automatic on/off
Tools And Materials Needed
Installing smart motion-activated lights yourself can save money and add convenience. You need specific tools and materials to do the job right.
Gathering everything before you start helps the process go smoothly. Here is what you will need for your DIY project.
Essential Tools For Installation
Using the right tools makes installation easier and safer. Most tools are common and easy to find at hardware stores.
- Electric drill with drill bits
- Screwdriver set (Phillips and flathead)
- Wire strippers and cutters
- Voltage tester or multimeter
- Measuring tape
- Level tool for even mounting
- Ladder or step stool
- Electrical tape
Safety Gear Recommendations
Safety gear protects you during installation. Always use protective items to avoid injury or accidents.
- Safety glasses to protect your eyes
- Work gloves for hand protection
- Non-slip shoes for secure footing
- Dust mask if drilling into walls
- Hearing protection if using loud tools
Additional Accessories
Extra accessories can improve your installation and the light’s performance. Consider these items for a better setup.
- Wire connectors and nuts
- Mounting brackets or plates
- Extension cords if power source is far
- Smartphone or tablet for app setup
- Instruction manual of your light model
Step-by-step Installation Guide
Installing DIY smart motion-activated lights is simple and useful. These lights turn on automatically when they detect motion.
This guide will help you set up your lights easily. Follow the steps to get your system working well.
Planning Sensor Placement
Choose spots where motion happens often. Sensors should cover entrances and dark areas well.
Avoid placing sensors near heat sources or direct sunlight. These can cause false triggers.
- Place sensors 6 to 10 feet high
- Cover main walkways and doorways
- Keep sensors away from windows and vents
- Test sensor view before final installation
Wiring And Electrical Setup
Turn off power at the breaker before starting. Safety first when working with electricity.
Connect the sensor wires to the light and power source. Use wire connectors and follow the wiring diagram.
- Use insulated tools to avoid shocks
- Match wire colors correctly: live, neutral, and ground
- Secure all connections with wire nuts
- Mount the sensor firmly after wiring
Configuring Motion Sensitivity
Adjust the sensor sensitivity to detect the right movement size. Too high sensitivity may cause false alarms.
Set the timeout period for how long the light stays on after motion stops. Choose what fits your needs best.
- Start with medium sensitivity settings
- Test by walking in front of the sensor
- Lower sensitivity if lights trigger too often
- Increase timeout for longer illumination
Testing And Troubleshooting
Turn power back on and walk near the sensor to test. The light should turn on quickly when it detects movement.
If the light does not work, check wiring and sensor settings. Fix any loose connections or wrong wires.
- Ensure power is on at the breaker
- Check if sensor lens is clean and unobstructed
- Reset sensor settings if needed
- Consult the manual for error codes or signals
Customizing Settings For Optimal Use
DIY smart motion-activated lights help save energy and add convenience. Adjusting their settings makes sure they work well for your space.
Proper customization lets you control when and how lights turn on. This guide covers key settings to optimize your smart lights.
Adjusting Light Duration
Light duration is how long the light stays on after motion stops. Set it based on your needs to avoid wasting energy.
Shorter durations work well for quick tasks. Longer times help if you stay in one place.
- Use 15 to 60 seconds for brief movements
- Choose 2 to 5 minutes if you stay longer
- Test and adjust to find the best timing
Setting Detection Range
Detection range controls how far the sensor spots movement. Set it to cover needed areas without triggering false alarms.
Too wide can cause lights to turn on unnecessarily. Too narrow might miss people entering the area.
- Start with medium range to test coverage
- Adjust to reduce false triggers
- Focus on entry points and main walkways
Integrating With Smart Home Systems
Connecting your lights with smart home systems adds control options. Use apps or voice commands to manage settings easily.
Integration also allows syncing with other devices for better home automation.
- Check compatibility with your smart hub
- Use routines to automate light behavior
- Control lights remotely using your phone

Credit: medium.com
Maintenance Tips
DIY smart motion-activated lights need regular care to work well. Proper upkeep helps them last longer and stay efficient.
Check your lights often and follow simple steps to keep them in good shape. This guide covers easy maintenance tips.
Regular Cleaning And Inspection
Dirt and dust can block the sensor and light. Clean the lights regularly with a soft cloth. Avoid using water or harsh cleaners.
Look for cracks or damage to the light case. Check that the sensor moves freely and is not covered by anything.
- Wipe the light and sensor gently every month
- Remove spider webs and debris around the light
- Inspect wiring and connections for damage
- Make sure the sensor detects motion properly
Battery Replacement Guidelines
Battery power is key for motion-activated lights. Replace batteries when lights dim or stop working. Use the right battery type for your model.
Remove old batteries carefully to avoid leaks. Insert new batteries with the correct polarity. Test the light after replacement.
- Check battery status every 3-6 months
- Use recommended battery brands and sizes
- Dispose of old batteries properly
- Keep spare batteries handy for quick changes
Firmware Updates And Upgrades
Firmware controls how your smart lights work. Keep the firmware updated to fix bugs and add features. Updates improve performance and security.
Check the manufacturer’s app or website for updates. Follow instructions carefully to avoid errors. Do not turn off the light during updates.
- Check for updates every few months
- Use a stable Wi-Fi connection during updates
- Restart lights after updating firmware
- Contact support if updates fail or cause issues
Common Issues And Fixes
DIY smart motion-activated lights are useful but can face problems. Knowing common issues helps you fix them quickly.
This guide covers sensor malfunctions, false triggers, and connectivity problems. Each section explains causes and fixes.
Sensor Malfunctions
Sensors may stop working or detect motion poorly. Dirt, dust, or bad placement often cause sensor issues.
Clean the sensor lens gently with a soft cloth. Move the light to a better spot if it faces direct sunlight or obstacles.
- Check if the sensor lens is clean and clear
- Adjust the sensor angle for better coverage
- Replace batteries or power source if needed
- Reset the sensor according to the manual
False Triggers
Lights may turn on without real movement. Pets, wind, or passing cars can cause false triggers.
Change the sensor sensitivity to reduce false alarms. Limit the sensor’s range or block areas with unwanted motion.
- Lower the sensor sensitivity setting
- Use shields to block small animals or branches
- Avoid facing busy roads or sidewalks
- Test the light after each adjustment
Connectivity Problems
Smart lights may lose connection to Wi-Fi or apps. Weak signals or outdated software cause connectivity problems.
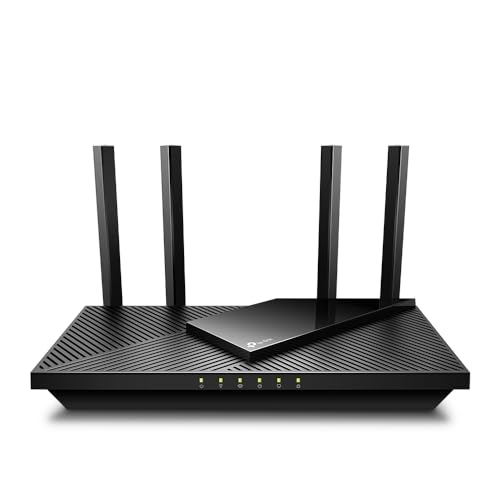
Move your router closer or use a Wi-Fi extender. Update the light’s app and firmware to fix bugs and improve performance.
- Check your Wi-Fi signal strength near the light
- Restart your router and smart light device
- Update app and light firmware regularly
- Reconnect the light to the network if needed

Credit: www.reddit.com

Credit: www.youtube.com
Frequently Asked Questions
What Materials Are Needed For Diy Motion-activated Lights?
You need a motion sensor, LED lights, batteries or power source, wires, and a mounting kit. Tools include a screwdriver and wire strippers. Choose components compatible with your setup. Quality materials ensure durability and better performance in your DIY project.
How Do Motion Sensors Work In Smart Lights?
Motion sensors detect movement through infrared or ultrasonic signals. When motion is sensed, they trigger the light to turn on automatically. This saves energy and adds convenience. Sensors can be adjusted for sensitivity and light duration based on your needs.
Can I Install Smart Motion Lights Outdoors Safely?
Yes, use weatherproof and waterproof components designed for outdoor use. Ensure proper sealing of electrical connections to prevent damage. Install the lights in covered or sheltered areas for added protection. Follow safety guidelines to avoid electrical hazards and extend light lifespan.
How Do I Customize The Light Duration And Sensitivity?
Most motion-activated lights have adjustable settings for duration and sensitivity. Use the control knobs or buttons on the sensor unit to set preferred times and detection range. Customizing these settings helps optimize energy efficiency and improves user experience.
Conclusion
Creating smart motion-activated lights is simple and rewarding. Save energy while enhancing your home’s security. These DIY projects are affordable and customizable. You’ll enjoy the convenience they bring to daily life. No need for technical expertise. Just follow easy steps, and you’re set.
Share your experience with friends and family. Inspire others to try this project too. Embrace the blend of creativity and technology. Happy crafting your smart home solutions!
20 min read

