
Are you worried about the safety of your home or business? Installing security cameras might be the solution you need.
Imagine having a watchful eye that never blinks, protecting your property even when you’re not around. You’ll discover simple steps to set up security cameras quickly and effectively. By the end, you’ll feel confident in making your space safer and more secure.
Ready to take control of your security? Let’s get started.
Choosing The Right Cameras
Installing security cameras helps protect your home or business. Choosing the right camera is very important.
You need to think about camera types, features, and where you will place them. This guide makes it easy.
Types Of Security Cameras
There are many types of security cameras. Each type fits different needs and places.
- Dome Cameras:Small and round, good for indoor use.
- Bullet Cameras:Long and cylindrical, often used outside.
- C-Mount Cameras:Cameras with removable lenses for different views.
- PTZ Cameras:Can pan, tilt, and zoom to cover large areas.
- Wireless Cameras:Easy to install without wires, use Wi-Fi.
- Wired Cameras:Connect with cables, usually more reliable.
Key Features To Consider
Look at important features before buying a security camera. They affect how well the camera works.
- Resolution:Higher resolution gives clearer images.
- Night Vision:Lets you see in the dark.
- Field of View:Wide view covers more area.
- Motion Detection:Alerts you when movement happens.
- Storage Options:Check if it saves videos on cloud or local devices.
- Power Source:Battery or wired power affects placement.
Indoor Vs Outdoor Cameras
Indoor and outdoor cameras have different designs. Choose based on where you want to install them.
Outdoor cameras must resist weather and work in tough conditions. Indoor cameras focus on clear images and style.
- Outdoor Cameras:Weatherproof, often have night vision and strong housing.
- Indoor Cameras:Smaller, less rugged, often focus on wide-angle views.

Credit: cctvmaintenance.com.sg
Planning Camera Placement
Placing security cameras well is key to good protection. Think about where cameras will see the most.
Good planning helps cover important spots and stops blind spots. This guide explains how to choose the best places.
High-risk Areas To Cover
High-risk areas are spots where problems are more likely. Cameras in these places catch trouble early.
Focus on places like entrances, driveways, and places with valuable items. These spots need clear views.
- Front and back doors
- Garage and driveway
- Windows on ground floors
- Yard and garden areas
- Places with expensive equipment
Optimal Camera Angles
Camera angles affect what you can see. Point cameras to cover wide areas and clear details.
Keep cameras at a height that shows faces and actions well. Tilt them to avoid glare from lights or sun.
- Use a 45-degree angle for wide views
- Place cameras 8 to 10 feet above the ground
- Avoid pointing directly at bright lights
- Adjust angles for clear face visibility
Avoiding Blind Spots
Blind spots are places cameras cannot see. These spots give troublemakers a chance to hide.
Check your camera views carefully. Move or add cameras to cover all important areas without gaps.
- Test camera views during day and night
- Use overlapping views from different cameras
- Check corners and hidden areas
- Adjust cameras if you find blind spots
Preparing For Installation
Installing security cameras needs careful planning. This helps the process go smoothly.
You should check your tools, power, and network before starting the setup.
Tools And Equipment Needed
Gather all tools before you start installing the cameras. This saves time and effort.
Common tools include screwdrivers, drills, and mounting brackets.
- Drill with bits
- Screwdrivers (flat and Phillips)
- Measuring tape
- Mounting brackets and screws
- Level tool
- Wire cutters or strippers
- Safety glasses and gloves
Checking Power Sources
Security cameras need a steady power supply. Check where to connect them.
Decide if you will use batteries, power adapters, or Power over Ethernet (PoE).
- Locate nearby power outlets
- Ensure power cables reach the camera spots
- Use extension cords if needed
- Check battery levels for wireless cameras
Network Requirements
Many cameras connect to the internet for remote viewing. Check your network setup.
Make sure your Wi-Fi or wired network is strong and stable at camera locations.
- Test Wi-Fi signal strength near each camera
- Consider wired Ethernet for better stability
- Check your router’s capacity for new devices
- Secure your network with strong passwords

Credit: www.sg-cctv.com
Step-by-step Installation
Installing security cameras helps protect your home or business. Follow these steps to set up your system correctly.
This guide covers how to mount cameras, run cables, and set up wireless systems. Each part is explained simply.
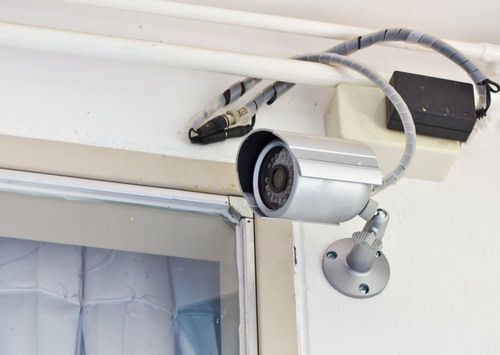
Mounting The Cameras
Choose a high place with a clear view for your camera. Make sure it covers the area you want to watch.
Use a drill to make holes for mounting screws. Attach the camera securely to the wall or ceiling.
- Pick a spot with good lighting
- Avoid direct sunlight on the lens
- Mount cameras out of reach
- Use the mounting template if included
Running Cables And Connections
For wired cameras, run cables from each camera to your recorder or power source. Keep cables tidy and hidden.
Use cable clips or conduits to secure cables along walls or ceilings. Avoid sharp bends to protect the wires.
- Measure cable length before cutting
- Label each cable for easy identification
- Connect cables firmly to cameras and recorder
- Test cables before finalizing installation
Setting Up Wireless Systems
Wireless cameras connect to your Wi-Fi network without cables. Place them where the signal is strong.
Follow the camera’s app or manual to add it to your network. Make sure you have a secure Wi-Fi password.
- Charge or install batteries if needed
- Keep cameras within Wi-Fi range
- Use the app to configure settings
- Test the video feed after setup
Configuring Camera Settings
Setting up your security camera correctly is important for good video quality and reliable alerts. Proper configuration helps you see clear images and detect motion effectively.
This guide explains how to adjust key settings like resolution, motion zones, and notifications.
Adjusting Resolution And Frame Rate
Resolution controls how clear the video looks. Higher resolution means sharper images but needs more storage space. Frame rate is how many images the camera records per second. Higher frame rates create smoother videos.
Set resolution and frame rate based on your needs and device limits. Lower settings save storage but reduce quality.
- Use 1080p resolution for clear video
- Choose 15-30 fps for smooth motion
- Lower settings save storage and bandwidth
Setting Motion Detection Zones
Motion detection zones let you pick areas to watch for movement. This avoids false alarms from busy streets or trees. You can block out zones where no alerts are needed.
Define zones carefully to cover important areas like doors and windows. This improves alert accuracy.
- Select zones with the camera app or software
- Exclude areas with frequent motion
- Test zones to ensure proper detection
Enabling Alerts And Notifications
Alerts notify you when the camera detects motion or other events. Enable notifications to stay informed on your phone or email. Customize alert types to avoid too many messages.
Set alert schedules to receive notifications only at certain times. This helps reduce distractions.
- Turn on push notifications in the app
- Use email alerts for important events
- Set quiet hours to limit alerts
Integrating With Security Systems
Installing security cameras is not enough for full protection. You need to connect them with your security system. Integration helps you monitor and record all activity easily.
This guide explains how to link cameras to DVR or NVR, connect to mobile apps, and use cloud storage options.
Linking Cameras To Dvr/nvr
DVR (Digital Video Recorder) and NVR (Network Video Recorder) store video from your security cameras. Linking cameras to these devices helps you save footage locally.
Wired cameras usually connect directly to DVR or NVR using cables. Wireless cameras connect over Wi-Fi to the NVR.
- Check camera and recorder compatibility
- Use proper cables for wired cameras
- Configure network settings for wireless cameras
- Test connection to ensure video recording
Connecting To Mobile Apps
Mobile apps let you watch your security cameras from anywhere. You can get alerts and see live video on your phone.
Most camera systems have apps you can download. After installing, link your cameras by scanning a QR code or entering a device ID.
- Download the official app for your camera brand
- Create an account or log in
- Follow app instructions to add your cameras
- Enable notifications for alerts
Using Cloud Storage Options
Cloud storage saves your camera videos online. This keeps footage safe even if cameras are damaged or stolen.
You can choose plans with different storage sizes. The cloud lets you access videos anytime using your mobile app or computer.
- Sign up for a cloud storage plan
- Link your cameras to the cloud service
- Set video quality and recording time
- Review stored footage from any device
Testing And Maintenance
Installing security cameras is just the start. Testing and maintaining them keeps your property safe.
Regular checks help cameras work well and catch any problems early.
Verifying Camera Coverage
Check each camera’s view to make sure it covers the right areas. Adjust angles if needed.
Test the cameras at different times of the day for good lighting and clear images.
- Walk around the area while watching the camera feed
- Look for blind spots or weak coverage
- Make sure important entrances and exits are visible
- Check for glare or reflections on the lens
Regular Cleaning Tips
Dust and dirt can block the camera lens and blur the image. Clean cameras often.
Use a soft cloth and gentle cleaner to avoid damage. Avoid harsh chemicals or sprays.
- Turn off the camera before cleaning
- Wipe the lens gently with a microfiber cloth
- Clean the camera housing to prevent dust build-up
- Check for spider webs or insect nests near cameras
Updating Firmware
Firmware updates improve camera performance and fix security issues. Install updates regularly.
Follow the manufacturer’s instructions to download and apply updates safely.
- Check for updates every month
- Use a secure connection when updating
- Restart cameras after updates to apply changes
- Keep a backup of settings before updating
Legal And Privacy Considerations
Installing security cameras helps protect your property. It also raises important legal and privacy questions.
You must follow laws and respect others’ privacy when using cameras. This keeps you safe from legal trouble.
Local Laws On Surveillance
Different places have different rules about cameras. Some areas require permission to record video or audio.
Check your city and state laws before installing cameras. Follow rules about where and how you can record.
- Know if audio recording is allowed
- Check if cameras can point at public areas
- Learn about limits on camera placement
- Understand data storage and sharing laws
Respecting Neighbor Privacy
Your cameras should not invade neighbors’ privacy. Avoid pointing cameras inside their homes or private yards.
Talk to neighbors if your cameras might record their property. Clear communication helps prevent conflicts.
- Place cameras to cover only your property
- Check camera angles regularly
- Ask neighbors about concerns
- Adjust cameras if neighbors object
Signage And Disclosure
Some areas require signs that warn people about video recording. Signs help inform visitors and passersby.
Use clear signs near cameras. This shows you respect privacy and follow the law.
- Place signs at all entrances
- Use simple language on signs
- Make signs easy to see and read
- Update signs if camera locations change

Credit: www.cnet.com
Frequently Asked Questions
How Do I Install Security Cameras At Home?
Installing security cameras involves choosing the right location and mounting them securely. Ensure they cover key entry points. Connect the cameras to a power source and your network. Follow the manufacturer’s instructions for software setup. Test the system to ensure it functions correctly.
What Tools Are Needed For Camera Installation?
You’ll need a drill, screws, and anchors to mount the cameras. A screwdriver and ladder may be necessary for hard-to-reach places. Use a cable tester for wired cameras. Follow the manufacturer’s guide for specific tools required for your camera model.
Can I Install Security Cameras Myself?
Yes, you can install security cameras yourself. Most systems are user-friendly with detailed instructions. Choose wireless cameras for an easier setup. If you prefer, hire a professional for installation. This ensures proper placement and functionality.
Where Should I Place Security Cameras?
Place security cameras at entry points like doors and windows. Cover driveways and garages for added security. Ensure cameras have a clear view and are out of reach. Avoid placing them in areas where privacy is expected, like bathrooms.
Conclusion
Installing security cameras improves home safety and peace of mind. Cameras help watch over your property day and night. They can discourage theft and keep your family safe. Choose the right camera type for your needs. Position cameras where they cover key areas clearly.
Regular checks ensure your system works well. With simple steps, you can protect your home better. Safety starts with good planning and smart choices. Take action today to secure your space.
22 min read